
The Secret to Optimal RF Welding and Sealing: Proper Care of Your Oscillator Tubes
Thermex-Thermatron Systems
Over eight decades leading the industrial sector, Thermex-Thermatron Systems (“Thermex”) and its pivotal radio frequency (RF) and microwave (MW) technologies have gone on to serve key global industries. When it comes to RF welding and sealing, Thermex’s systems have proven reliable and innovative in improving safety, efficiency, and throughput across production lines. Without operational RF Oscillator Tubes, you may not be getting the most out of your equipment or dielectric materials. Here is a guide to ensuring your oscillator tubes remain in premium condition and understanding when it is time to replace them — so you can trust your RF technology is generating its best possible performance.
Protecting One of the Most Valuable Parts of Your RF System: Industrial Triodes
First, when you gain access to a new RF system, it is necessary to install oscillator tubes, also known as industrial triodes. It’s crucial to install these tubes correctly, as this serves as one of the most expensive parts to help your RF system run smoothly and effectively. Because these tubes are consumable items, this means they will require replacement. When you install your equipment, Thermex-Thermatron strongly recommends you consider purchasing a second tube to keep in inventory.
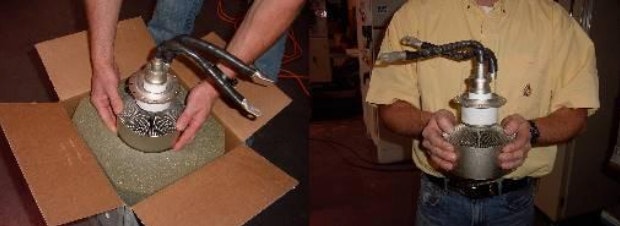
Take tremendous care and caution. The oscillator tube is fragile, and as such, should only be handled by the heat radiator (plate) structure. It would be perilous to lift the tube by its ceramic body, the grid collar, or the filament leads. Not only should you never do this, you should also avoid bumping or jarring any oscillator tube. Otherwise, you face grave consequences; where rough or improper handling of the oscillator tube could result in concealed damage. When your tube is damaged in this way, you will risk it not being serviceable under warranty.

Step 1: Handling the Oscillator Tube
Set the tube with the heat radiator down into the socket. You want to push down gently all around, so that the bottom rim of the heat radiator sits firmly on the support shoulder of the socket.

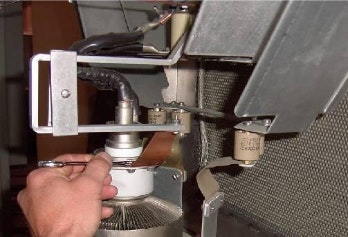
Step 2: Install the Oscillator Tube in Its Precise Socket
When the tube is firmly seated in the socket, it may be rotated as necessary, allowing easy connection of the filament and grid leads.
Step 3: Find and Connect Your Filament Leads
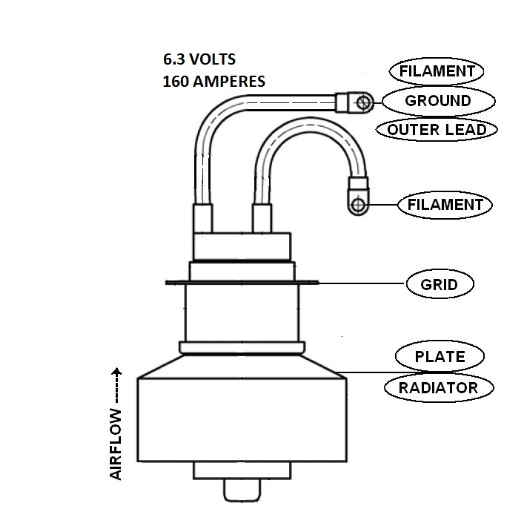
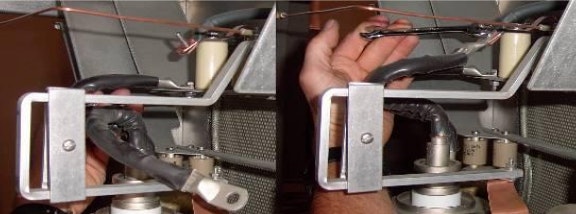
The two (2) heavy black leads protruding from the top of the tube are the filament leads. The inner lead should be connected to the off ground filament connection. You will find this lead located directly above the oscillator tube, close toward the rear wall of the oscillator compartment. The outer filament lead should be connected to the filament ground stud — immediately adjacent to the off ground filament lead insulator.
Step 4: Connect the Grids
Make sure your filament operating current is 160 AMPS; and make sure these filament connections are tight.
Connect the copper strap from the open end of the grid trombone to the grid collar on the oscillator tube. It may be necessary to slightly rotate the tube. Look inside the strap to ensure the bolt hole lines up with one of the bold holes in the grid collar. Attach the air deflector on the back side of the grid collar. Take caution — make sure the air deflector is not touching either one of the filament leads.
Testing Your New Tubes Is Crucial to Protect Your Warranty
When you have received a new tube, either a replacement tube or one that will serve as a spare, you should unpack and inspect it; testing it in a working unit (one you can trust is operating properly). If erratic operation of the equipment occurs with the new tube, it is possible your tube has been damaged in the process of shipping. In that case, notify the transportation company immediately.
If you fail to test the tube upon receiving it, this may result in the tube warranty being voided.
The Safest Way to Store and Maintain New Oscillator Tubes
Whenever possible, store tubes in their original containers. Additionally, keep power tubes in an upright (vertical) position, protecting all tubes against chemicals, fumes, moisture, and extreme or rapid temperature changes.
If you place power tubes in service before the warranty period expires, they will not need further attention. However, you should operate or test your power tubes every three to six months. When placing any type of tube in service, be sure to use the oldest one first.
Each time you place a tube in service, you should create and keep a service record for the following:
- The tube type
- Serial number
- Filament hour meter reading
- The date on which the tube was placed in service
A 10-Step Guide: How to Deliver Optimal Design Voltage
When a new tube arrives, the grid and filament structures commonly contain loose metallic hairs that have separated from the elements. These compromise your tube’s ability to support the design voltage. Consequently, the tube arcs and the arc suppressor/plate overload will shut an RF system down. The objective is to remove these hairs by literally “burning” them off; hence the term “burning” in the tube. To do so requires the following:
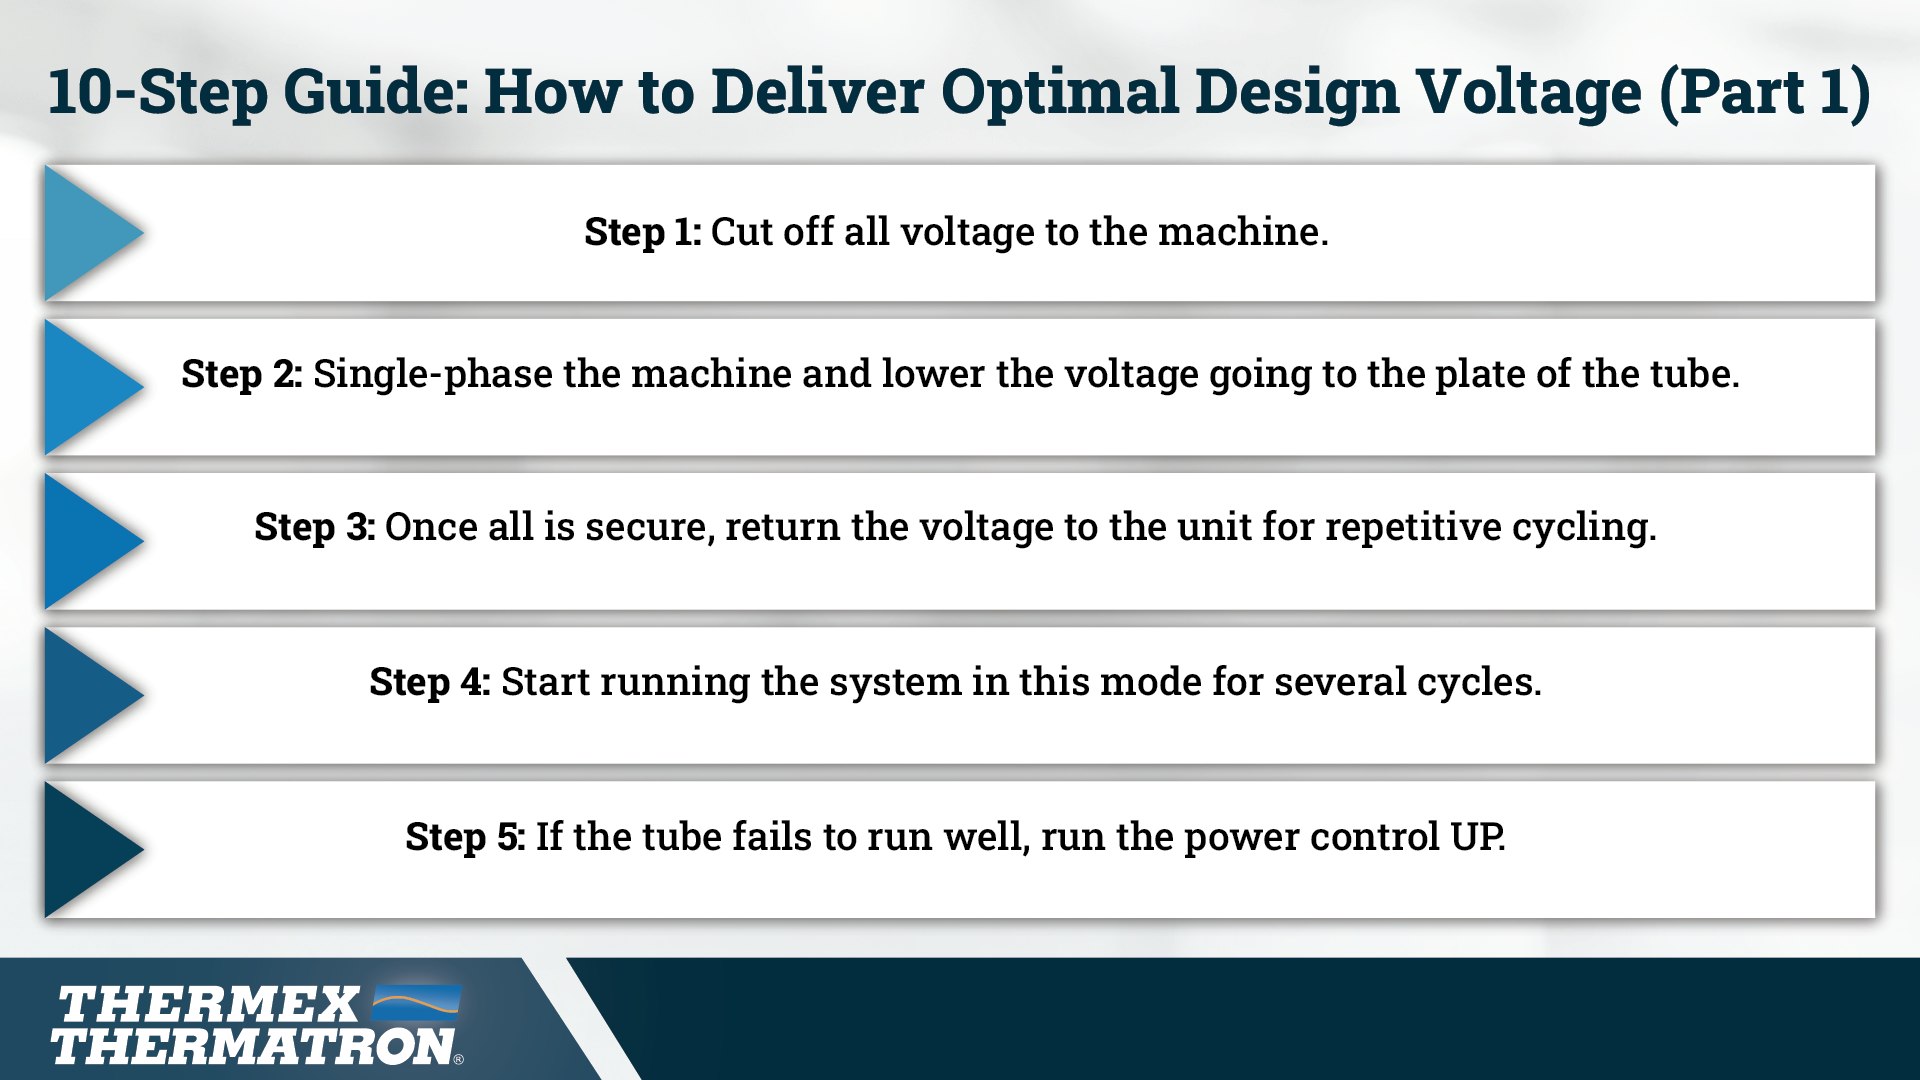
Step 1: Cut the Voltage
Turn off all voltage to the machine.
Step 2: Single-Phase the Machine and Lower the DC Voltage
Remove any of the transformer’s secondary leads, right from the top of one of the rectifier cards. Tie the open lug end in a knot; lug facing up — isolated from all components. This will help you prevent conduction from incidental contact with other conductors, devices, or metallic surfaces.
The disconnected lug must be stored in some secure fashion; before returning voltage to the system. The objective is to lower the DC voltage going to the plate of the tube. This will help improve its ability to manage the voltage applied.
Step 3: Returning the Voltage
Only once all is secure — return voltage to the unit for repetitive cycling.
Step 4: Start Running the System
Run the system in this mode for several cycles. This will begin the burning process, removing as many unwanted “hairs” as possible.
Step 5: Is Your Tube Not Running Well? Turn Up the Power
If the tube is extremely obstinate and fails to run under these conditions, run the power control UP. Although this increases the voltage on the load (and simultaneously, the output), it decreases the voltage on the tube.
Step 6: If the Tube Still Arcs, Attempt This Adjustment
First, remove all voltage to the machine. Try RAISING the tap setting on the primary of the plate transformer; up to its highest setting. Then, return the voltage. This again will lower the plate voltage.
Step 7: Run Cycles Until the System Hits “Zero”
As you run repetitive cycles, proceed to lower the power setting every two or three cycles. Do so until you reach a completely unloaded or “zero” power setting. If the tube arcs at any point, raise the power back up. Run several cycles and begin once again. This will help you lower the power until you are able to run the system at the “zero” setting.
Step 8: Proceed to Three-Phase Operation
Remove all voltage. Then, reconnecting the transformer lead will allow you to initiate three-phase operation. Return voltage and begin running repetitive cycles, just as before. When you do so for the first time, be sure to raise the power control setting once again (as in Step 3). Then, slowly bring the power control setting down between cycles.
Step 9: If the Tube Starts to Falter, Repeat the Process
Should the tube begin to fail at any stage on a regular basis, be sure to return to a previous step where it will run. Proceed through the steps once again.
Step 10: Return Taps Right into Operating Place
If it was necessary to change taps in Step 4, be sure they are returned to their operating positions before proceeding with production.

We Can Create Your Next High-Power Presses and Sealers — Upgraded with RF Oscillator Tubes
Replacing, testing, storing, and maintaining RF Oscillator Tubes are instrumental measures to ensure exceptional performance of Thermatron Presses and Sealers. Thermex provides tubes that offer support systems from 4 to 120 kw, so you can utilize the power of these products to best leverage your Thermatron RF Systems. Creating powerful equipment that delivers controlled RF welds quickly and consistently, Thermex leverages the same process to manufacture premier presses, sealers, and material handling systems.
With over 80 years of experience in developing, engineering, and building, Thermex-Thermatron has honed the expertise to produce intelligently designed RF systems — making work conditions safer while ramping up the pace of production and processing speeds. Optimizing our industry-leading understanding of the physics of RF heating, Thermex-Thermatron empowers manufacturers across global industries, providing equipment of the highest quality and efficiency throughout the sealing and cutting arena.
For more information, please visit our new website - thermex-thermatron.com.
For Thermex and Thermatron inquiries, contact our Director of Sales, Dean Mancuso (Sales@thermex-thermatron.com; 502/916-8972 or 502/243-5636).
For FIAB and Oteman inquiries, contact our Sales Representative, Matt Damon (MDamon@thermex-thermatron.com; 502/916-8975 or 859/618-0237).
